
Hey Everyone, Bobby here. I have a great project to share with you today. We are going to play around with a Panel version of a One Block Wonder quilt! I don’t know about you, but I am REALLY excited!
First… A little bit about me. I have been with Quilts & Quilts for a couple of years now… I am a happy quilter and I love my life and my career with Quilts & Quilts. I hope that’s good enough.
Let’s get to it!
At Q&Q, we love to help pick out beautiful fabrics and provide you with all of the materials you need, but more importantly to all of us, we want you to enjoy the experience and be successful. There is going to be allot of information here and if you are an experienced quilter, you will know most of what I am going to share with this project. If you have made a One Block Wonder Quilt before, you may think that my approach is a little crazy, but this is my first one and I really enjoyed the process putting my own spin on things.
I have fancy machines and some high-end tools, but this is what I do for hours everyday plus work full time at the shop, so don’t feel like you have to have everything. You can be just as successful with the basics. No pressure. (If you want to see these items on our website click here)
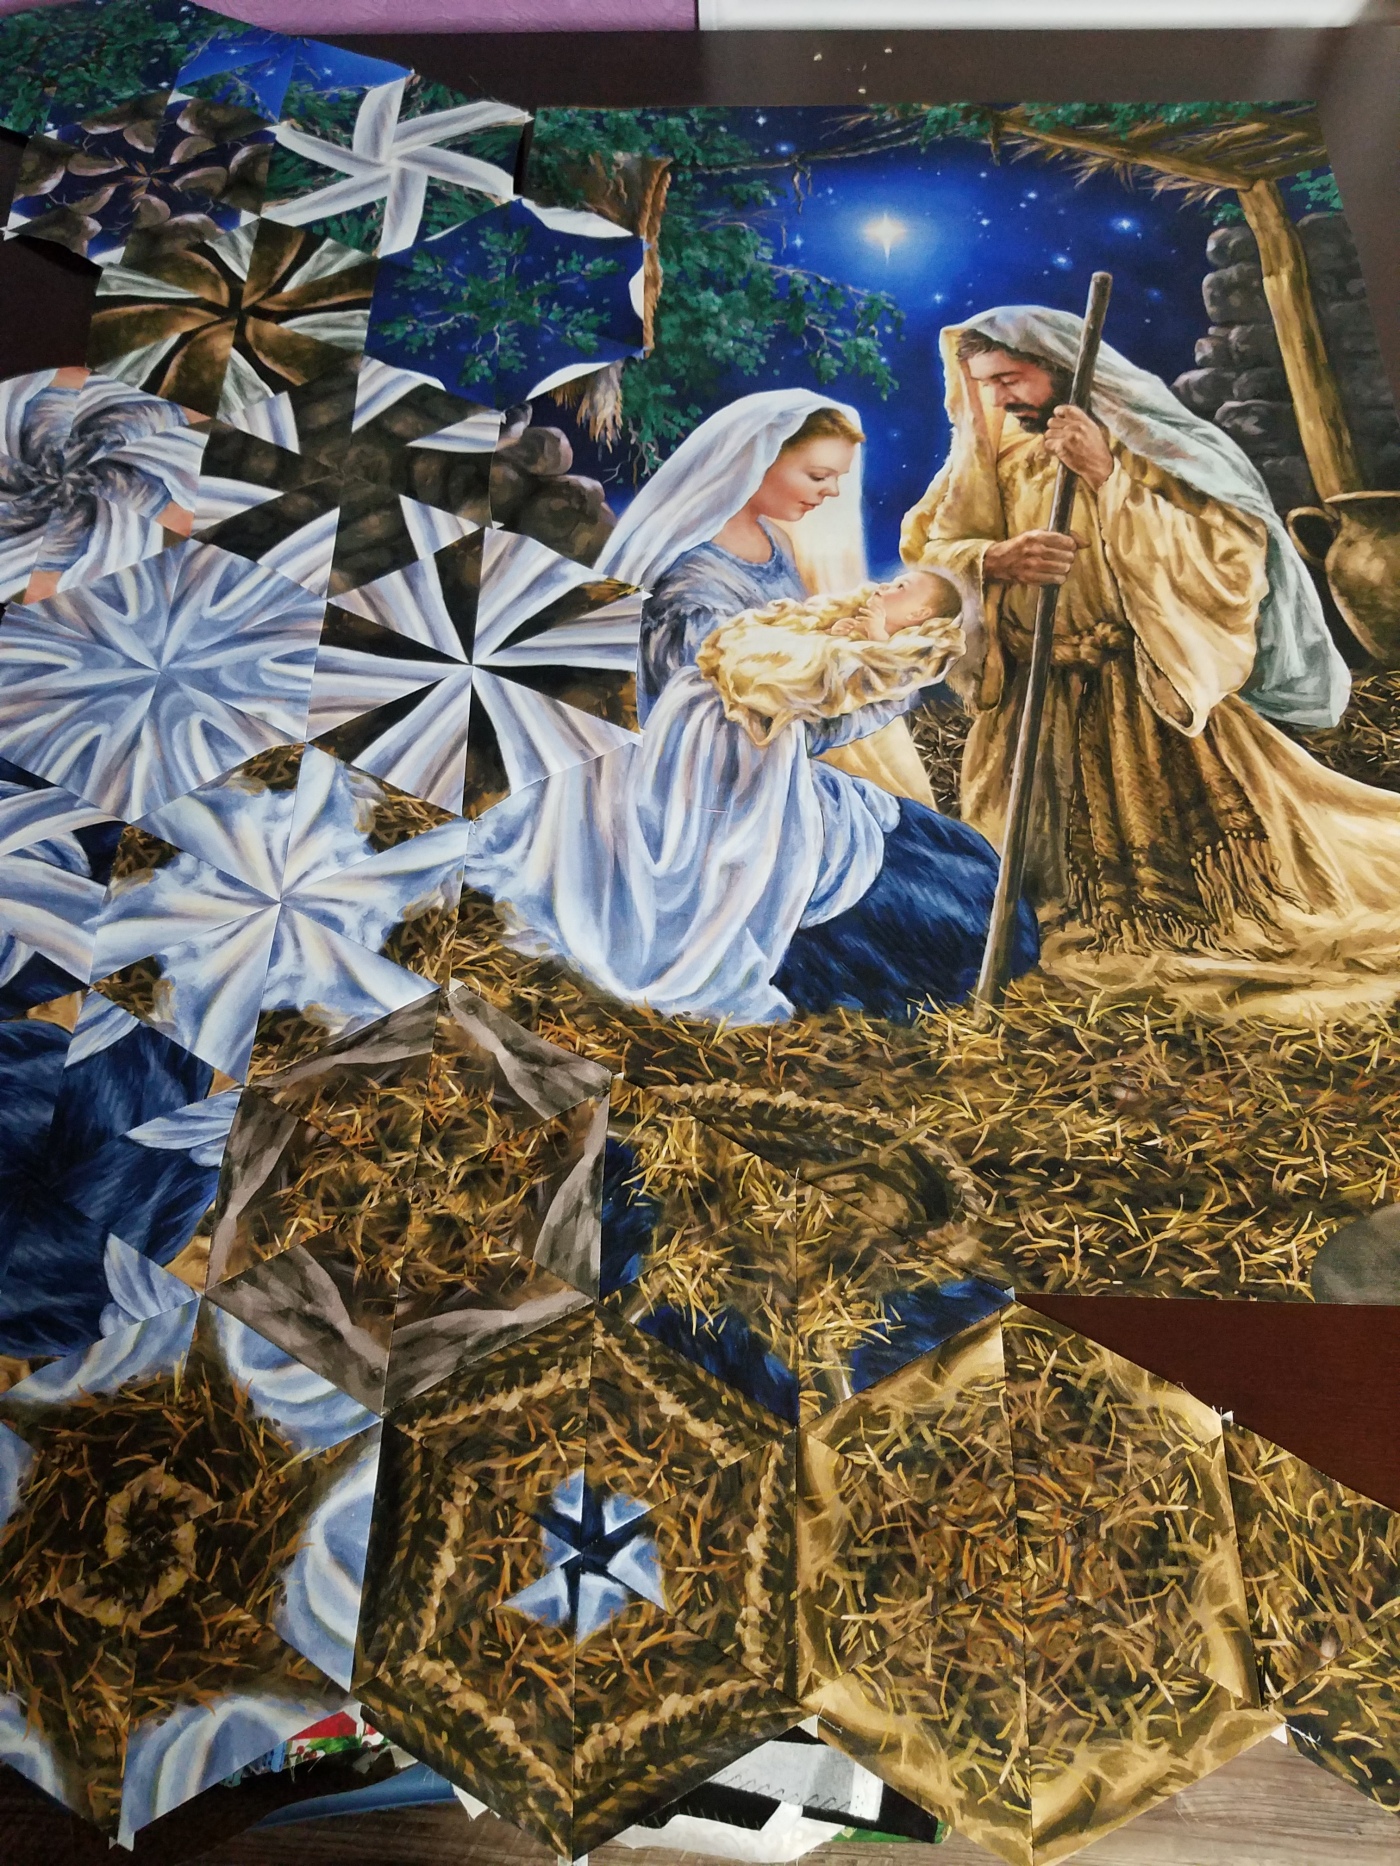
So, first off… preparation of the panels. To accomplish this quilt, you will need to have 7 of the same panels. This is a stunning manger scene panel by Timeless Treasures that we just got in at the shoppe. Available here.

This quilt is almost all sewn together on the bias. Bias can be very stretchy and messy with all of the fraying that happens, so I wanted to make sure this started off perfectly with no frustration.
My lovely wife was kind enough to treat all of the panels with Terial Magic for me. If you have met me in the store in the past two years, you will find out quickly that I am obsessed with this stuff! It takes any fabric and makes it stiff like paper. Cutting is a breeze, there is absolutely no fraying of fabric and sewing anything on the bias is always perfect because it removes the stretch. I could have done this project without it, but I wouldn’t have wanted to. It took almost a whole small bottle to treat the 7 panels.
Since I wasn’t here when she treated it, I wasn’t able to take pictures of the process, but this is how it works.
We cut all of the panels individually as this is timed. Simple spray both sides of the fabric generously with Terial Magic. We used a guest bathroom shower and pants hangers with clips to hold up the panels. Sprayed both sides and then let them hang in the shower for 15 minutes. The 15 minute time window is pretty important, so be sure you can do this without destraction. Once the 15 minutes is up, take the panel to your ironing board and press until the panel is completely dry and stiff. This does take a few minutes, but you will be amazed with the results! If the Terial Magic starts to build up or is too heavy in spots, turn the steam on with your iron. We really didn’t have a need to do that. It went very well. The Terial Magic is water soluble, so cleaning the shower afterwards is easy and when the quilt is washed later, it will completely wash out leaving you a very soft quilt. Being a longarm quilter, I love to custom quilt a quilt top that was treated with Terial Magic. The seams are perfectly straight and the tops are really square.
Next, I put one of the panels aside and stacked 6 of them, one on top of the other and all face up.
I put a new blade in my rotary cutter as I am cutting through 6 layers of fabric, but with the treated fabric, cutting is really easy and you won’t wear yourself out by the time you cut all of your shapes. (You can order replacement blades here.)
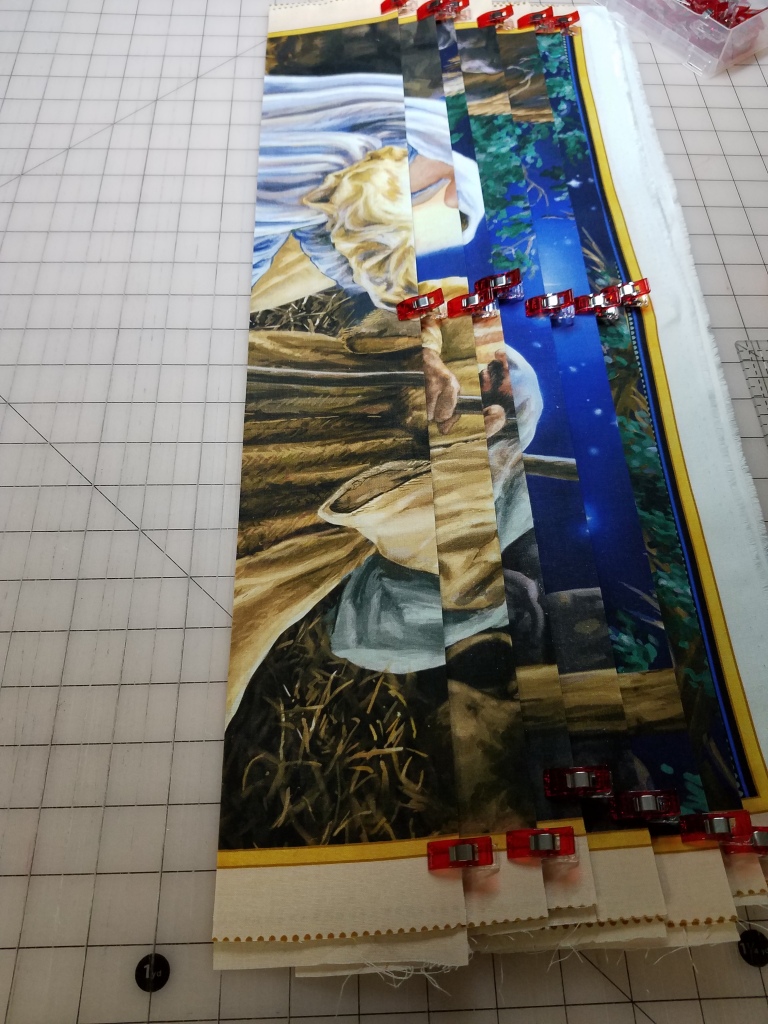
The first cut is to trim the decorative border from both the top and bottom of the panel.

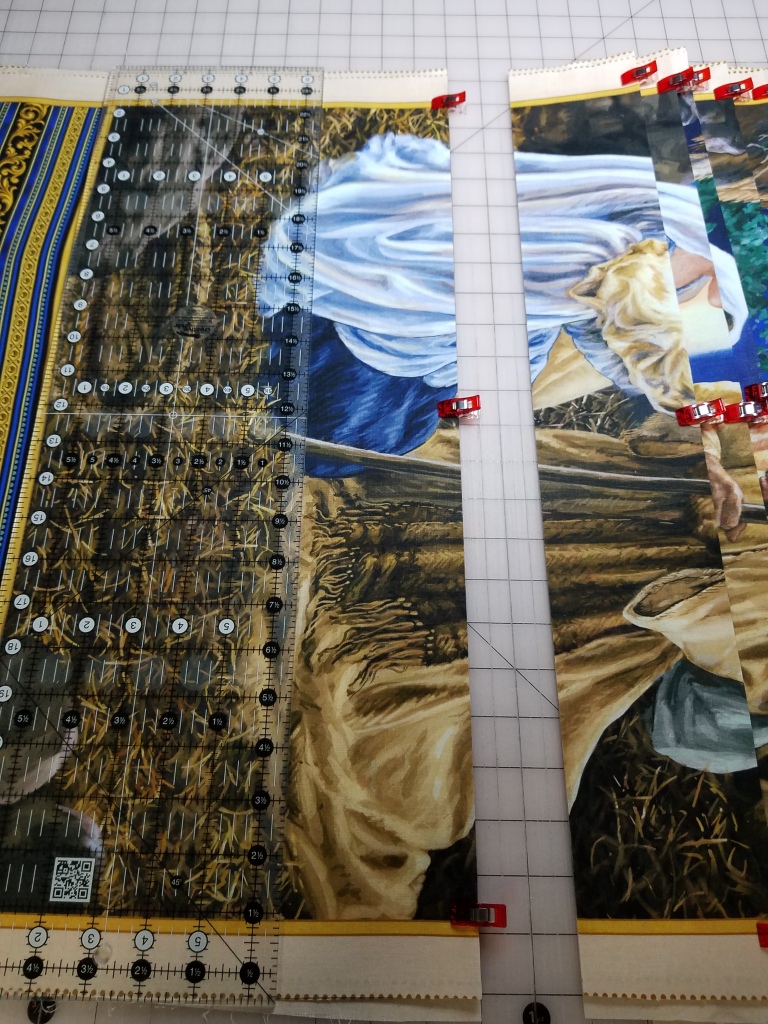
As directed by most people who have made the One Block Wonder style of quilts, I decided to follow along and cut my strip sets at 3 ¾”. I am not a big fan of pinning, but I do love Wonder Clips, so that is what I used throughout the who process. Once the borders were removed, I put a couple of wonder clips along the edge before cutting the strips to keep them in the right arrangement after lining up the fabric well.
As I cut a row, I slid over the stack and cut the next and kept them stacked.
Once all the strips were cut, it was onto the triangle stacks. After quite a bit of research, I decided to use the Creative Grids 60 degree equilateral triangle ruler.

You will notice that is has really great markings, a grippy surface and a flat knotch in the top of the ruler. When you a spinning triangles for hours, that knotch makes all the difference in the world!

Now… If you are a really brave rotary cutter, you just go ahead and do that you are comfortable with. I am not a brave cutter, so I kept the wonder clip on the left and made my first cut. Then I flipped the stack and ruler over and cut the other direction.
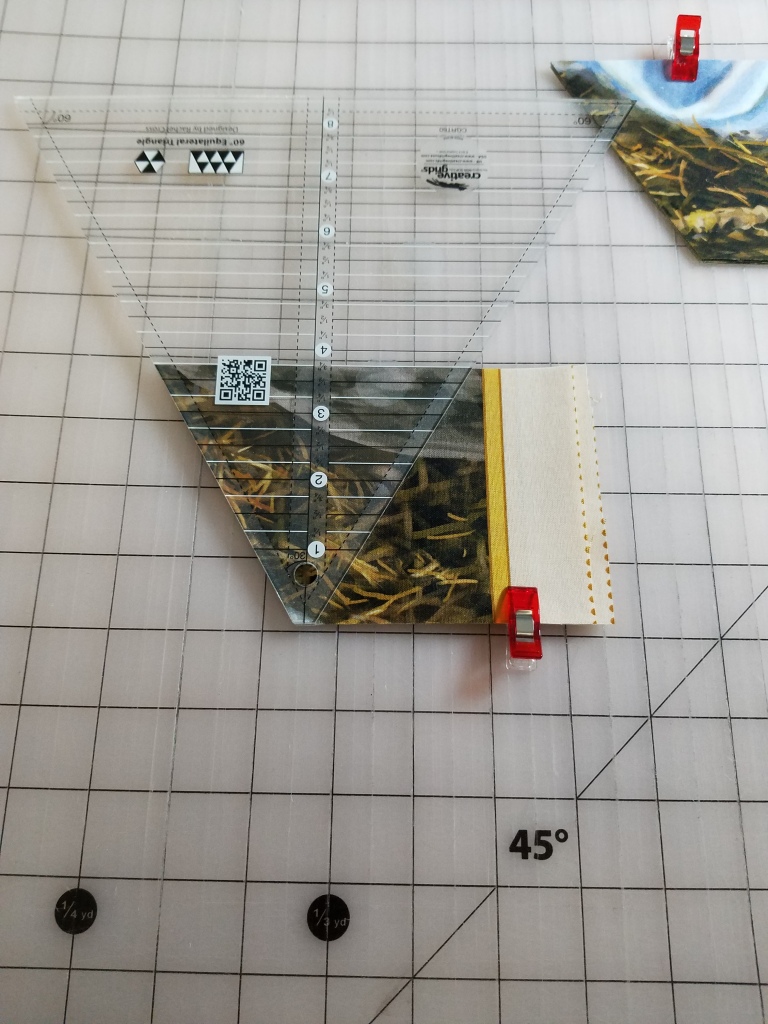
From there, I was able to just flip the ruler and leave the strip stack until the entire row was cut.


As I went along cutting my stacks, I clipped each stack and kept them in rows as I cut everything.

When I had everything cut, I laid out all of the rows on the table next to my sewing machine so that I could easily grab them as I went.

Since the fabric is stiffened and I am ready to do allot of sewing, I put in a new Size 80 Quilting Titanium Needle. I didn’t know how long the project would take, so the titanium needle kept me from having to time. And… Yes… I am one of those people. Needles are the least expensive maintenance you can do for your machine and still get perfect and tight stitches… It makes all the difference in the world. I loaded them machine with a neutral colored 50wt Aurifil Thread (my favorite piecing thread) and setup my machine. I have several machines and normally would use my Janome high speed straight stitch machine, but for this project, I decided to use my Pfaff Creative Sensation Pro. With chain piecing this much, I love using it with the needle down position and how I never have to touch the foot lift. Again, you can do this with any machine. Just make sure that you have a very good scant 1/4” seam allowance and a good tight stitch length.
In the next image, you will see how my machine defaults when you turn it on. On the left (0.0), you have the stitch width (or in this case needle position) and on the right (2.5) you have the stitch length. Both of these must be adjusted.

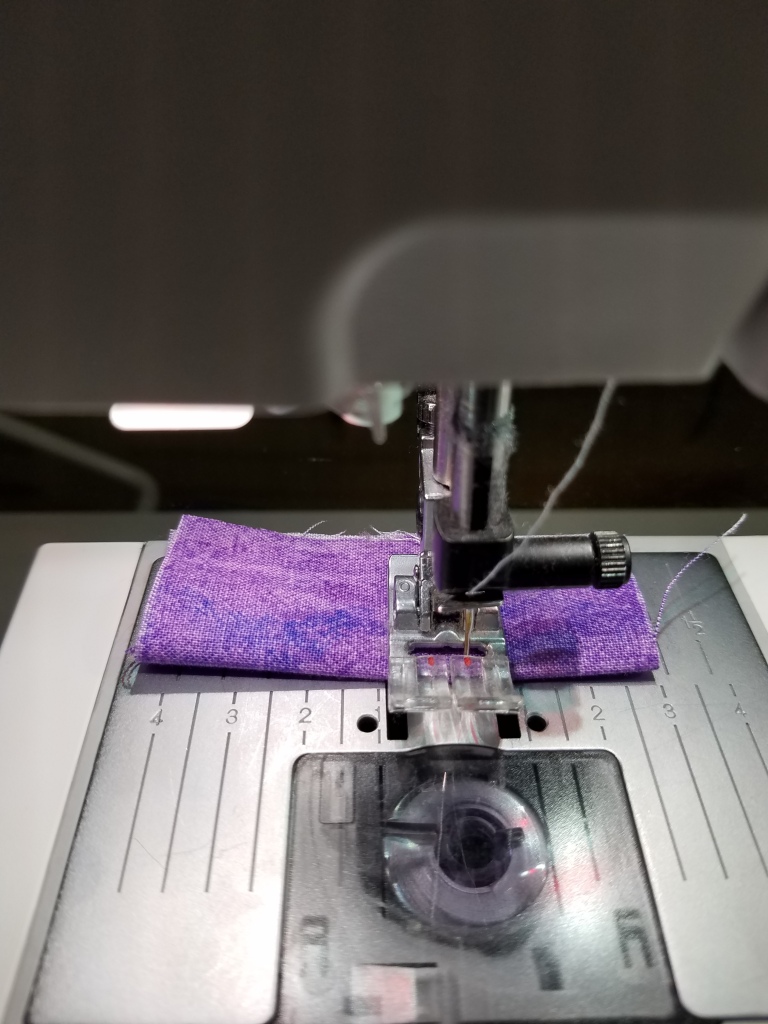
This machine has a 9mm stitch width and a built in walking foot, so I almost always leave the walking foot engaged. You will see on the foot that there are two little red marks. These are the perfect scant ¼” from the edge of the foot. So, I simply change the settings and move the needle.

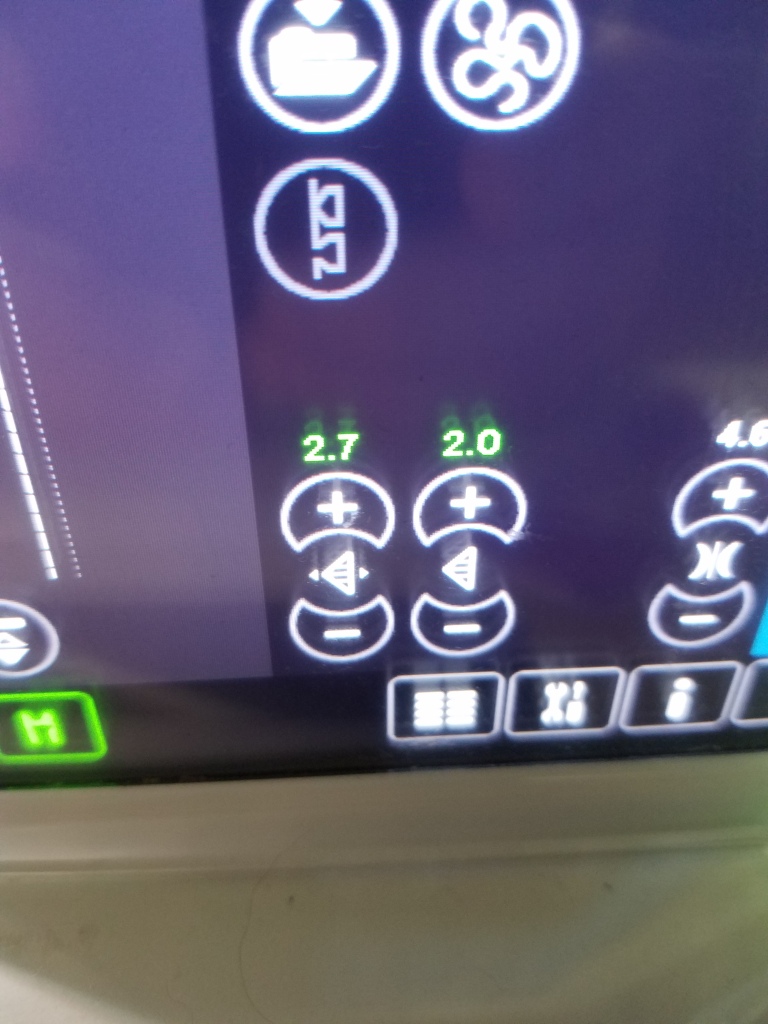
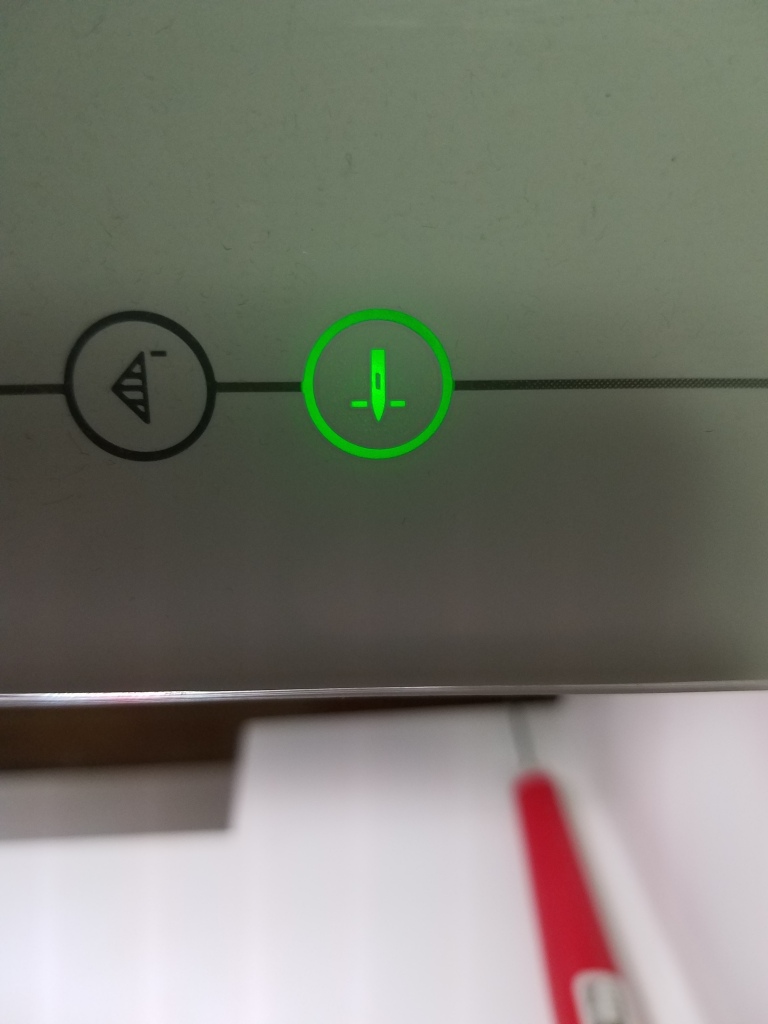
I moved the needle to a 2.7 and then tightened the stitch length up to a 2.0. This worked out to be the perfect setting for this quilt! I also used the needle down feature. The foot comes up just a little bit when you stop, so you can just go right to the next piece when you are chain piecing.
Now we are ready to sew. Grab a scrap piece of fabric and start stitching.
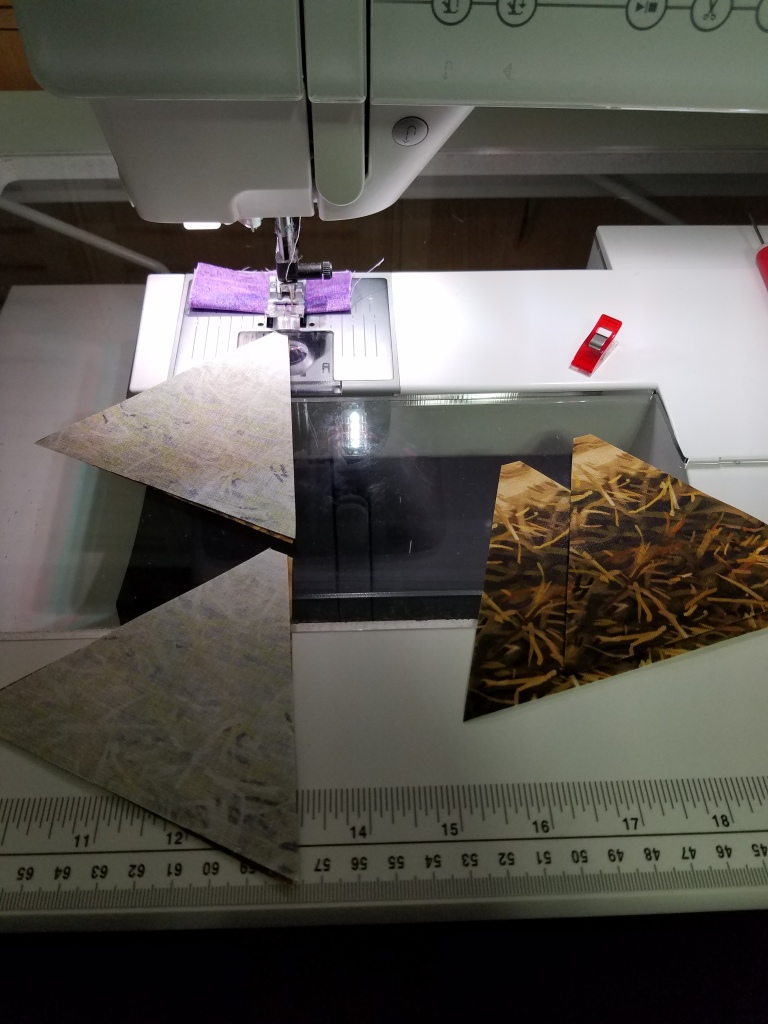

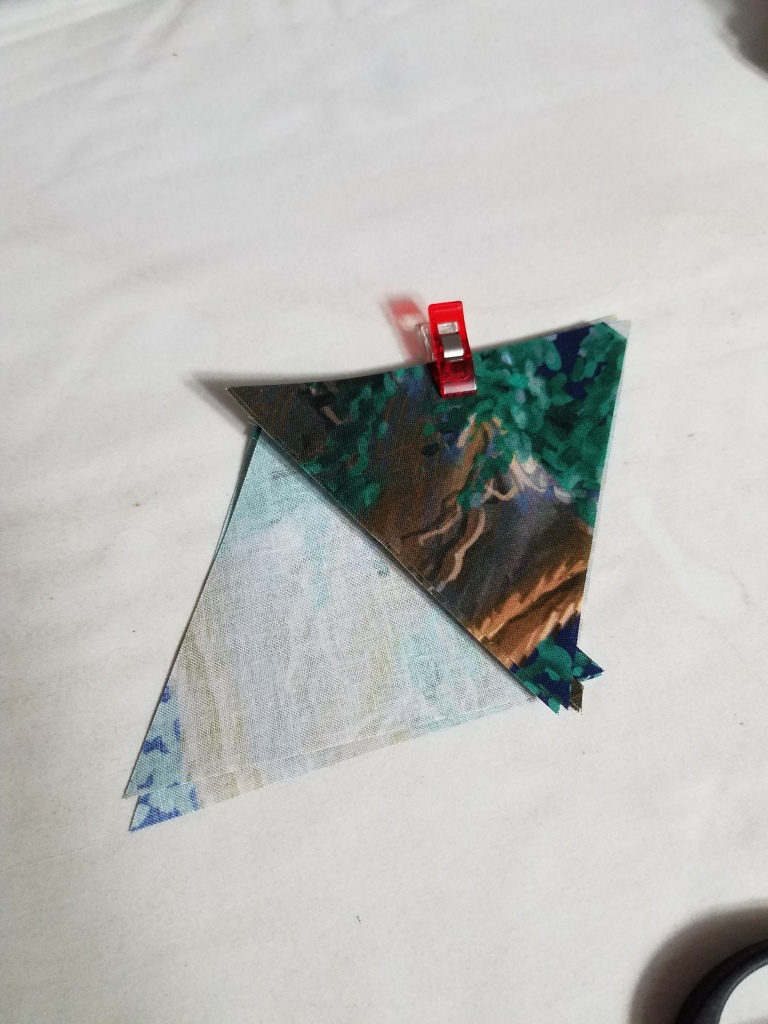
Starting with the first stack of 6 matching triangles, I chain pieced the first two sections and had the 2 extra pieces right there with me.


I grabbed my next set and started sewing them. When the second set was stitched, I used a wonder clip and clipped all of the pieces together again. Many people do stacks and boxes and all kinds of things. There are a couple of really amazing tutorials on YouTube where the quilter literally walks you through on a video of lining up, going from machine to ironing board… etc. This is what worked best for me. I wanted to keep my rows in order as well as my hexies together.

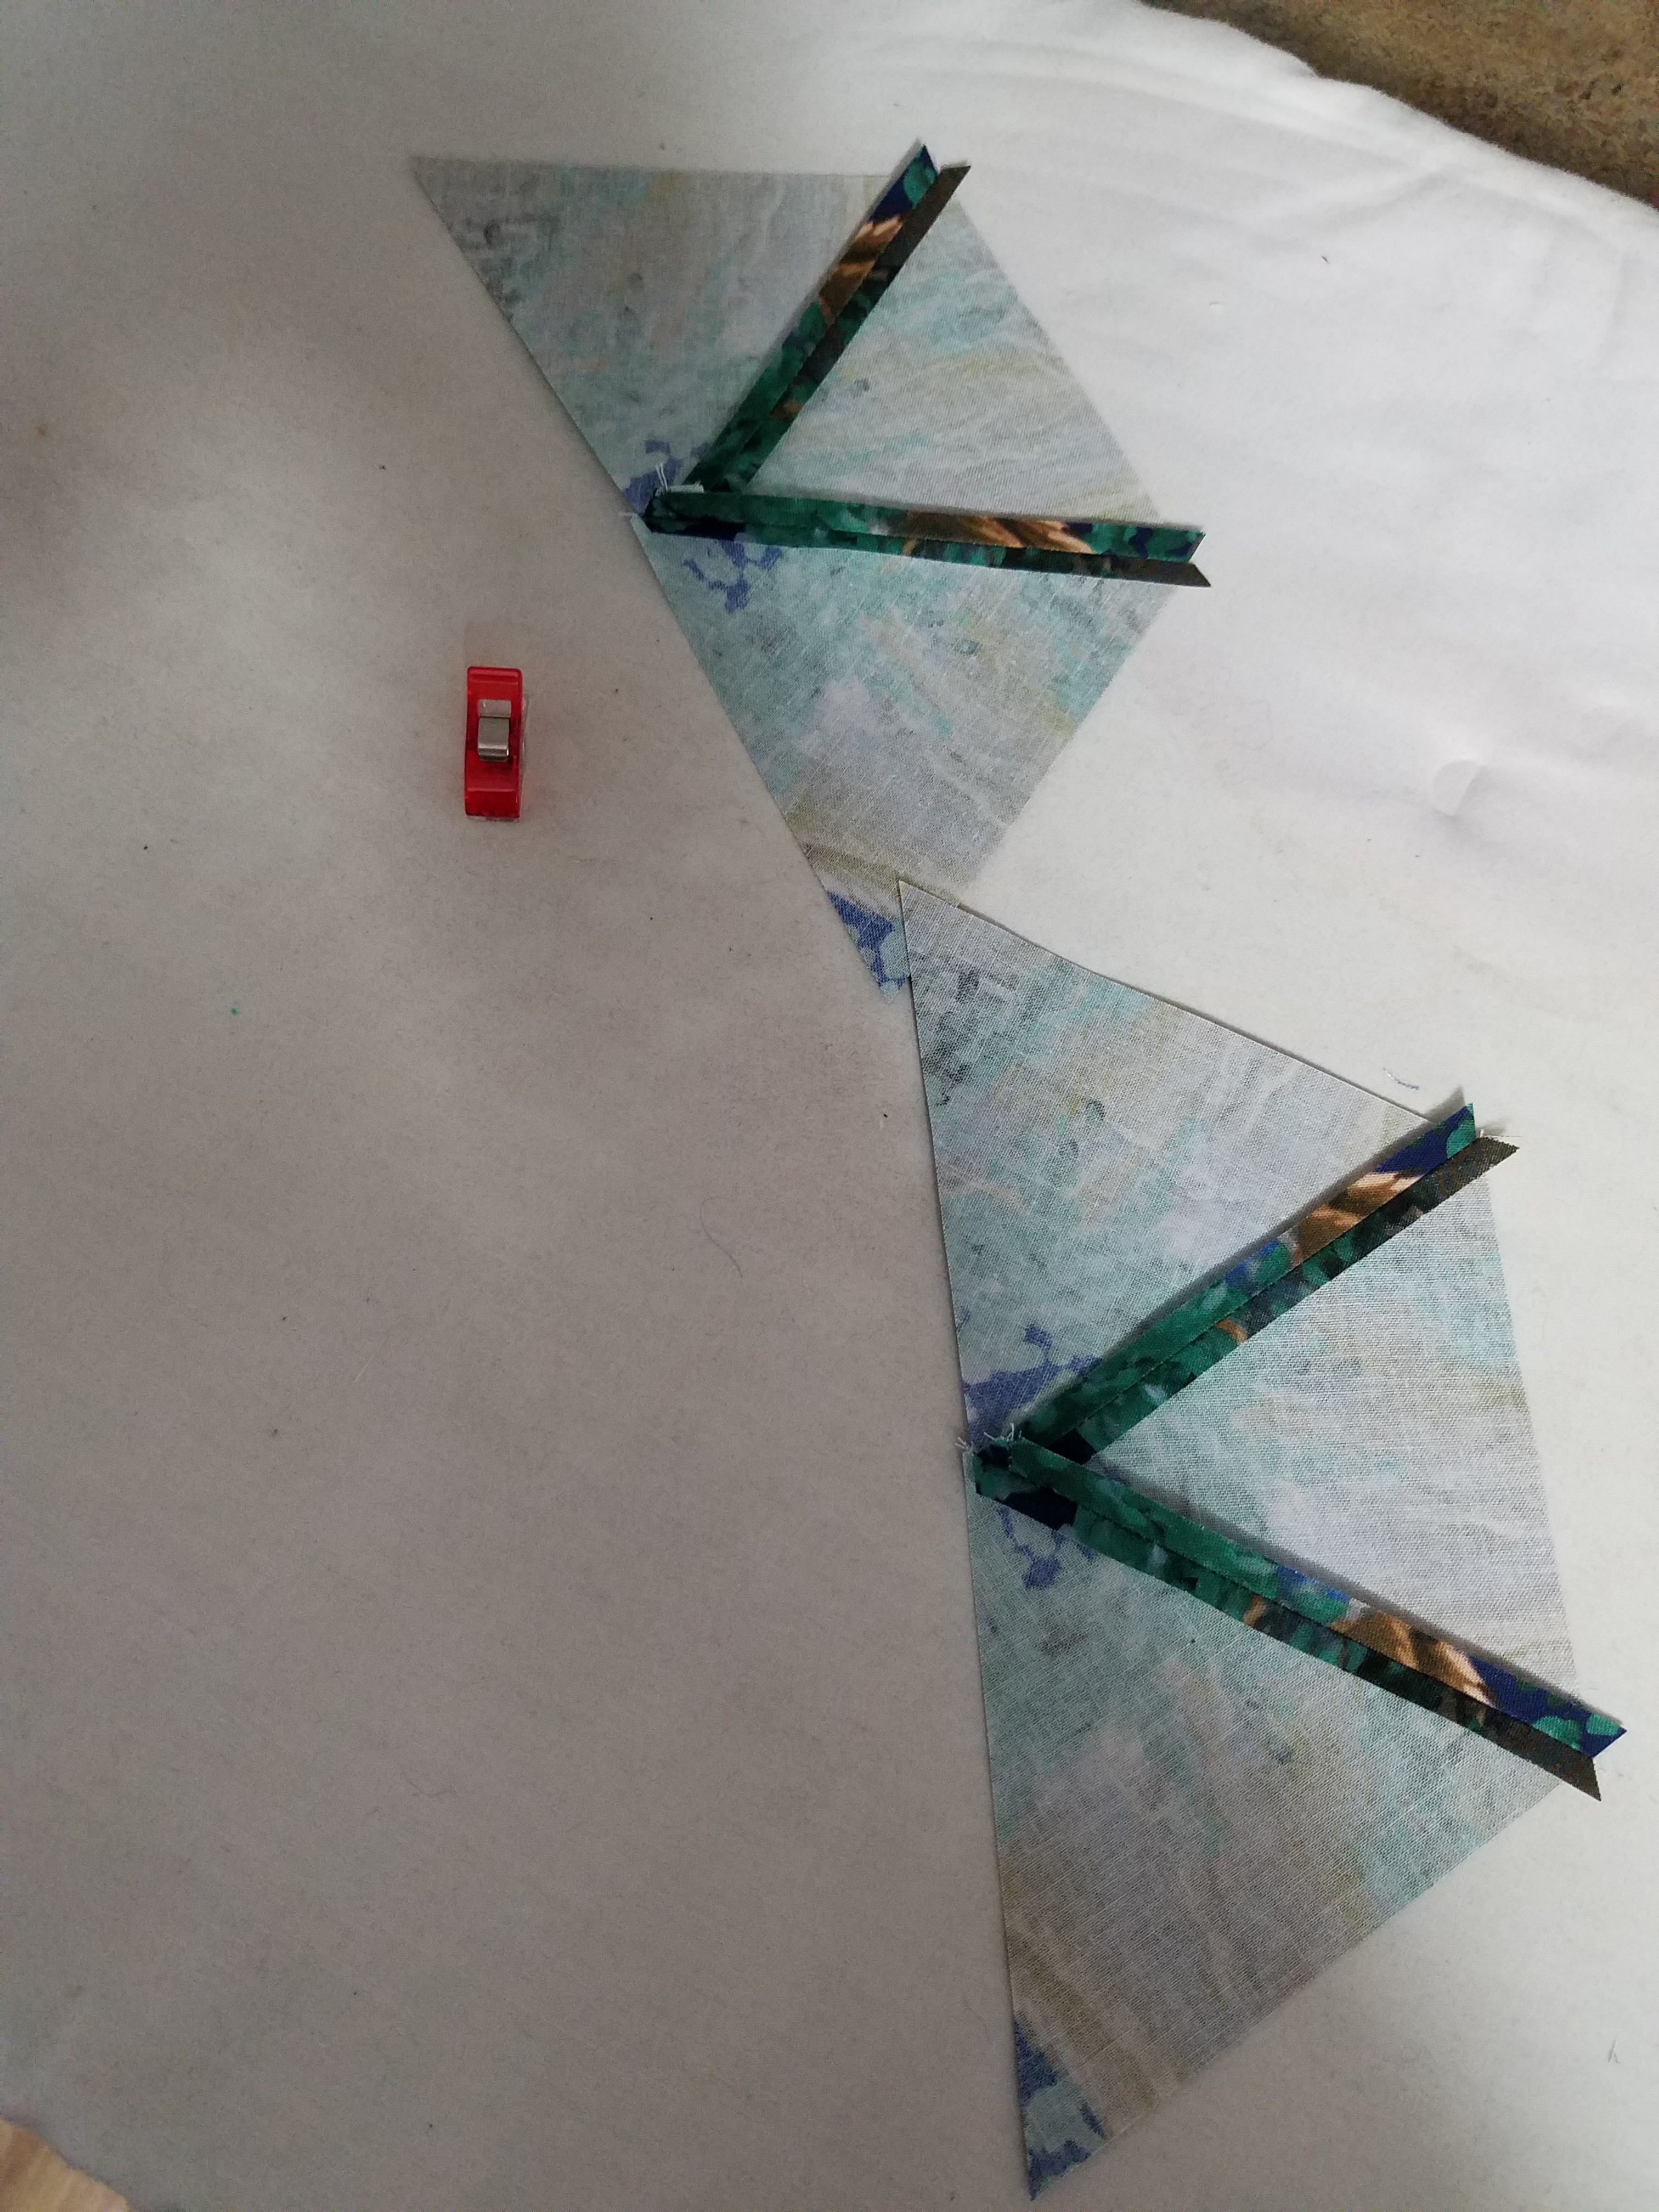
As I sewed the sets together and pinned them, I stacked them in a basket in the order that they were coming off the machine, which was fed by the order I had them stacked on the table. Then over to the ironing board, where I pressed the seams open. When done, I put the clip back on the stack and back into another basket.


Then it’s back to the sewing machine, chain stitching both completed half hexies and then clipping together in stacks from one basket to the other.


Then, it’s back to the ironing board and pressing all of the seams open again giving you two identical half hexies. Pin back together and back in a basket.

Now, this is where reference comes in. You have to decide how you are going to layout your quilt.

The One Block Wonder book has amazing photography and there are a ton of amazing pictures online of how everyone decided on their layout. Unfortunately, I somehow lost a couple of pictures as I was going along with this, so I don’t have any staged photos of the process. I just tried to keep things as close to the panel as they could be and make sure that there would still be similar light to the edges of the quilt. Once I decided on the layout, I started sewing all of the half hexies end to end making large strips.
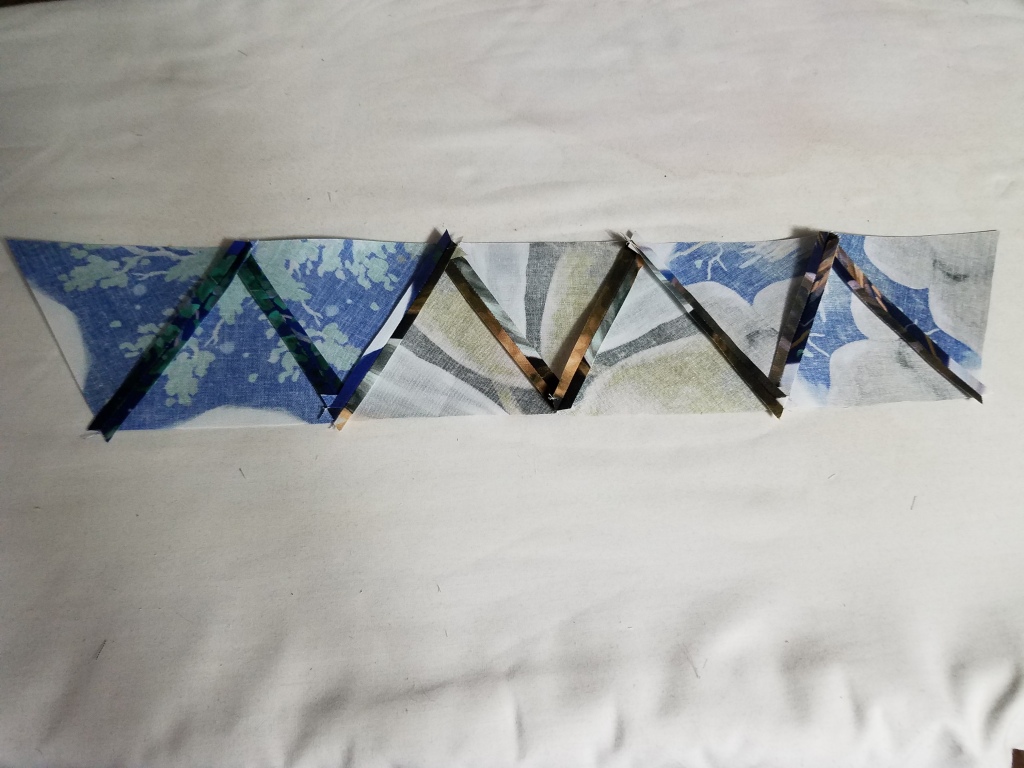
Each time, Always pressing the seams open.
I actually sewed the entire group of blocks together competely leaving space for the panel. It’s the first time I have ever made a quilt top with a giant hole in the middle of it.
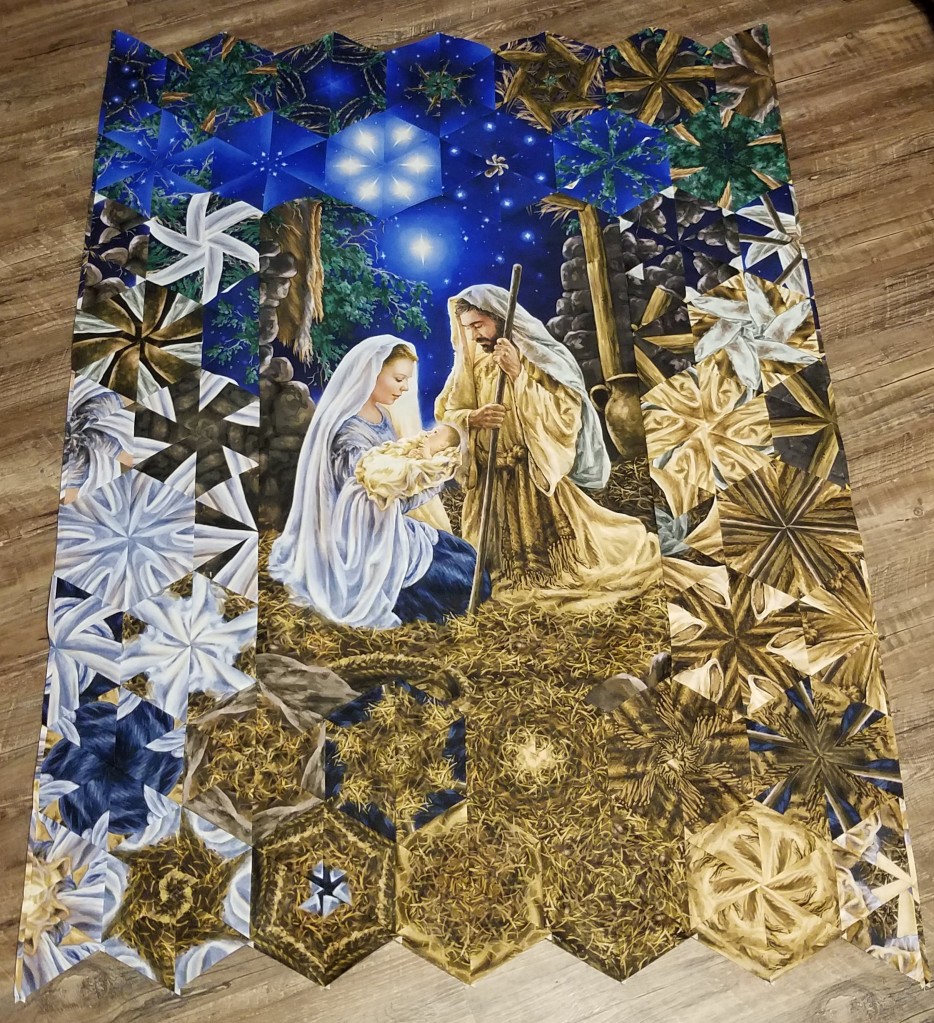
I then realized, that my sides were pretty much perfect for the size of the panel, so that 3 ¾” Strip size was very important. I trimmed the hexies on both sized and then sewed a ¼” Seam on the left, pressed it so that the panel went over the who thing, then I made sure the panel was underneath everything, folded the edge of the quilt with wonderclips and sewed a ¼” seam from the hexies on the other side. Pressed and made sure everything was good and flat, and then I folded under the edges of the hexies ¼” and top stitched everything completely closed using a closely matching thread.
This is the finished top for now. I am off to the shoppe to see if Lacey wants to add any borders and pick out a backing.
Whether or not you are a longarm quilter, I hope you will come back here in a week or so and join me as we finish it up. Once all of the final decisions are made, we will have kits available for this. See all the featured items here.
Thank you so much for hanging out with me today, and please comment and let us know what types of other things you would like to see. It’s wonderful to visit with you while you are on vacation, but what things do you need help with or direction on. Do you want to see more projects and tutorials like this? I’d like to know. Please feel free to comment, share this story and even tell me if I did everything wrong. I’m not scared. If you would like to e-mail your suggestions or comments, you can find me at bobby@quiltsandquilts.com.

August 16, 2019 at 8:08 am
Wow, this is stunning! I’ve never done a one block wonder quilt. Now I think I may have to go find that book and give your technique a try! Thanks for sharing!
LikeLiked by 1 person
December 2, 2019 at 9:33 pm
I’m currently working on this panel to do the OBW quilt – I cut the strips at 2 3/4″ and like the size. Are you going to post how you quilted this quilt? I’d love to see it.
LikeLike